This article will demonstrate usage of cordova-plugin-ble-central with IONIC 4. i.e.
Mobile application connectivity with BlueTooth Low Energy Devices.
Before we start I assume that you already have ionic4 blank project working.
When you run ionic server command following screen should open in browser
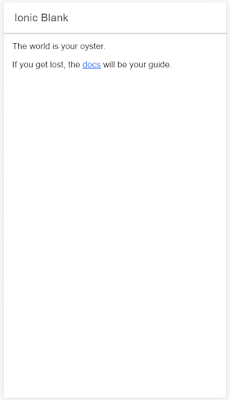 |
| Ionic4 BLE (Bluetooth Low energy sample/example code) |
On command line or in visual studio terminal use following commands to install BLE Ionic plugin
$ ionic cordova plugin add cordova-plugin-ble-central
$ npm install @ionic-native/ble
Above commands will add required cordova plugin and ionic4 wrapper for Bluetooth low energy devices communication.
I am using default Home page to display list of available BLE Devices, on TAP of device it will be redirected to details page for further operations.
We shall add following line of code to import BLE
Home.page.ts file looks as follows
import { BLE } from '@ionic-native/ble/ngx';
import { Component, NgZone } from '@angular/core';
import { NavController, ToastController } from '@ionic/angular';


@Component({
  selector: 'app-home',
  templateUrl: 'home.page.html',
  styleUrls: ['home.page.scss'],
})
export class HomePage {

  constructor(
    public navCtrl: NavController,
    private toastCtrl: ToastController,
    private ble: BLE,
    private ngZone: NgZone
  ) {}

}
After this make sure BLE provider is added in
app.module.ts
import { NgModule } from '@angular/core';
import { BrowserModule } from '@angular/platform-browser';
import { RouteReuseStrategy } from '@angular/router';

import { IonicModule, IonicRouteStrategy } from '@ionic/angular';
import { SplashScreen } from '@ionic-native/splash-screen/ngx';
import { StatusBar } from '@ionic-native/status-bar/ngx';

import { AppComponent } from './app.component';
import { AppRoutingModule } from './app-routing.module';

import { BLE } from '@ionic-native/ble/ngx';

@NgModule({
  declarations: [AppComponent],
  entryComponents: [],
  imports: [BrowserModule, IonicModule.forRoot(), AppRoutingModule],
  providers: [
    StatusBar,
    SplashScreen, BLE,
    { provide: RouteReuseStrategy, useClass: IonicRouteStrategy }
  ],
  bootstrap: [AppComponent]
})
export class AppModule {}
Now we shall add following functions for Bluetooth low energy (BLE) device discovery and listing BLE devices.
- scan - scan for ble devices for 5 seconds.
- onDeviceDiscovered - this function will execute if any BLE device is discovered.
- scanError - this function will be called if any error occurs in scan function
- setStatus - simple function to set message
Above functions we are adding in home.page.ts file. Location setting should be on while scanning devices, else you will see error message
scan() {
    this.setStatus("Scanning for Bluetooth LE Devices");
    this.devices = []; // clear list

    this.ble.scan([], 5).subscribe(
      device => this.onDeviceDiscovered(device),
      error => this.scanError(error)
    );

    setTimeout(this.setStatus.bind(this), 5000, "Scan complete");
  }

  onDeviceDiscovered(device) {
    console.log("Discovered " + JSON.stringify(device, null, 2));
    this.ngZone.run(() => {
      this.devices.push(device);
    });
  }

  // If location permission is denied, you'll end up here
  async scanError(error) {
    this.setStatus("Error " + error);
    let toast = await this.toastCtrl.create({
      message: "Error scanning for Bluetooth low energy devices",
      position: "middle",
      duration: 5000
    });
    toast.present();
  }

  setStatus(message) {
    console.log(message);
    this.ngZone.run(() => {
      this.statusMessage = message;
    });
  }
Please check HTML of
home.page.html
<ion-header>
  <ion-toolbar>
    <ion-title>
      BLE Connect
    </ion-title>
    <ion-buttons slot="end">
      <ion-button click="" scan="">
        Scan
      </ion-button>
    </ion-buttons>
  </ion-toolbar>
</ion-header>

<ion-content>
  <ion-list>
    <ion-item click="" device="" deviceselected=""
 ngfor="let device of devices">
      <ion-label>
      <h2>
{{ device.name || 'Unnamed' }}</h2>
{{ device.id }}
     RSSI: {{ device.rssi }}


      </ion-label>
    </ion-item>

   </ion-list>
</ion-content>

<ion-footer>
  <ion-toolbar>
    <ion-item>
    <ion-label>{{ statusMessage }}</ion-label>
    </ion-item>
  </ion-toolbar>
</ion-footer>
Now build app using following command
ionic cordova build android
This will create an APK file which will list BLE devices after scan. You can click on scan button or can add scan() function in ionViewDidEnter()
ionViewDidEnter() {
    console.log('ionViewDidEnter');
    this.scan();
  }
Now we are able to build Bluetooth low energy device listing app in ionic4
In next Article
ionic 4 bluetooth low energy - sample code - Connect to BLE Devices we shall connect to BLE devices.


